It’s 4PM on a Tuesday afternoon and your boss tells you she needs a 50-page training document turned into a presentation by the end of the day. Don’t panic! With Microsoft Word and PowerPoint, creating a presentation from a pre-existing Word document is as easy as 1-2-3.
1. Create a Word outline
If you already use headings (levels H1, H2, etc.) in Microsoft Word, then this step is already started for you! Follow these simple steps to create an outline within your documents:
Open Word.
In the Ribbon at the top, click on the View tab then select Outline to automatically create a document outline.

If you don’t already have headings in your document, you’ll see a bulleted list with a separate bullet for each paragraph.

To add structure to your document, select the appropriate headings for each section in the Outlining tab. For example, use Level 1 for slide titles and Level 2 for bullet points on each slide.

Continue until all of your content is organized and assigned a heading. Then click Close Outline View.

2. Save your Word document
This is the easiest step of all! Simply save your document by hitting CTRL + S on your keyboard, clicking the Save icon at the top of your document, or going to File > Save. Then hit Close. Your document must be closed in order to import your outline into PowerPoint.
3. Import your Word document into PowerPoint
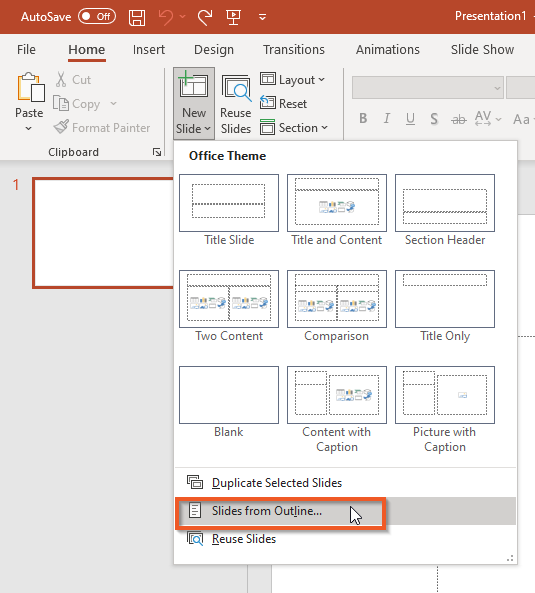
Open PowerPoint. In the Ribbon at the top, click New Slide then select Slides From Outline. Choose your desired Word file then click Insert.

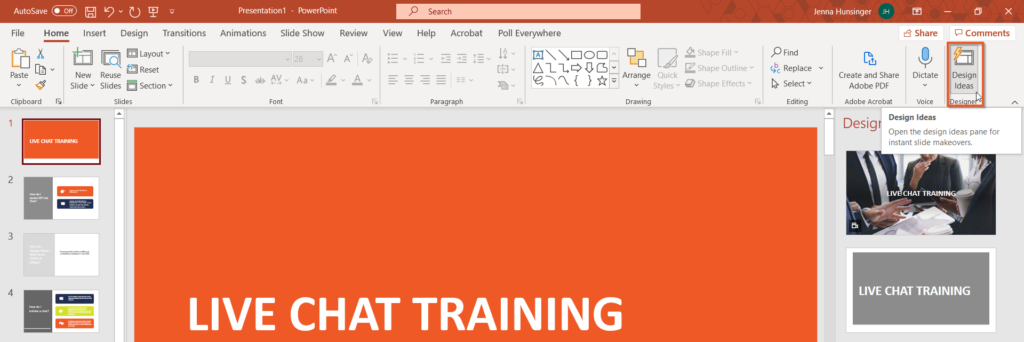
Voilà! Most of your work is automatically done for you. Now all you have to do is add a cover slide and adjust the design settings to match your brand (the Design Ideas section is a great tool). Happy presenting!


