Breakout rooms offer a smaller forum for collaboration and meaningful, open conversations that are otherwise difficult to have in large group meetings. Thanks to Microsoft Teams, these handy spaces are now available virtually. Meeting organizers on the Windows & Mac desktop versions of Teams can create and manage breakout rooms. Here’s how to use breakout rooms in Microsoft Teams:
How to create a breakout room
Select Breakout rooms in the meeting controls bar.

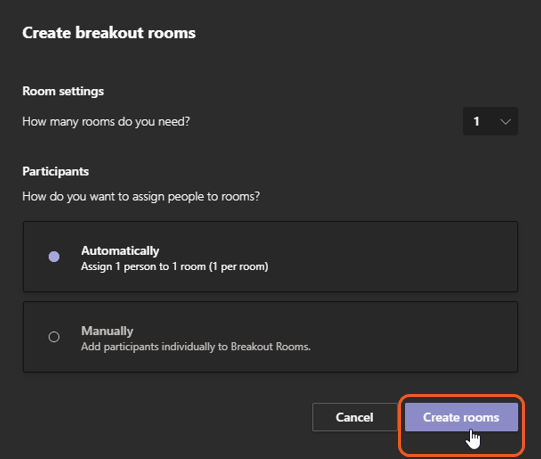
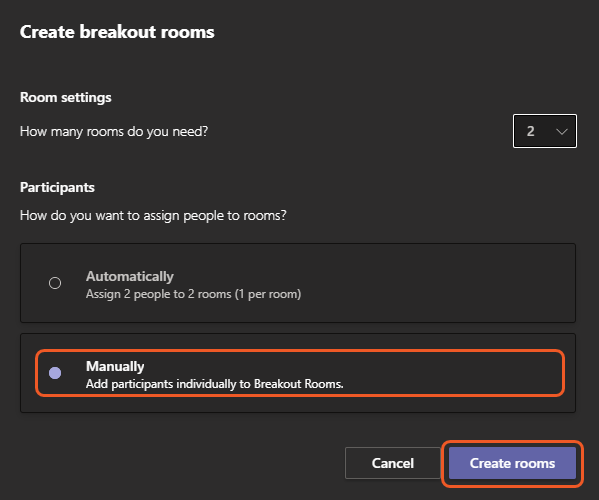
Choose how many rooms you need and how you’d like to assign participants. You can either have participants assigned Automatically or Manually. If you choose to Automatically assign, you can’t go back and change it.
How to manually assign participants to a breakout room
When creating your breakout rooms, select Manually.
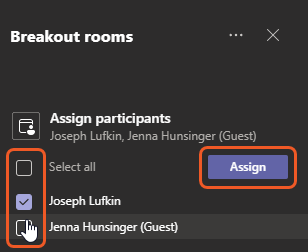
Choose the participants who will share a breakout room by checking the box next to each name. Click Assign.
Select a room for the group.
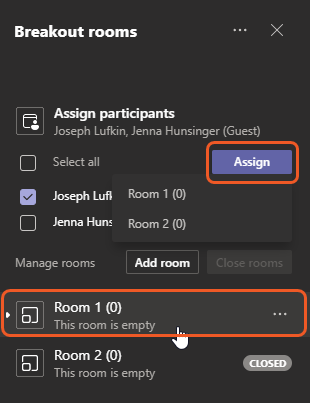
Repeat steps 2-4 until all participants have been assigned to a room.
How to rename a breakout room
To change the default name on a breakout room, click More options.
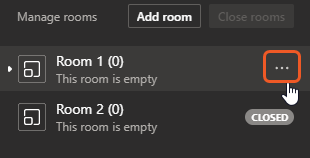
Select Rename room.
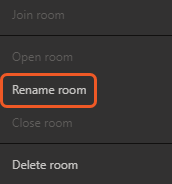
Type in the new name then click Rename room.
How to use a breakout room
Opening a room:
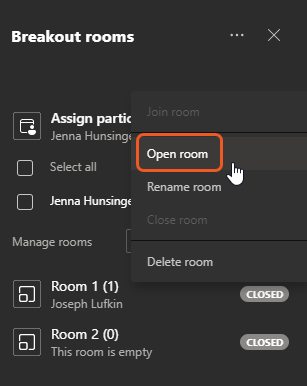
You can open all rooms at the same time by clicking Start rooms or individually, by selecting More options (…) > Open room.
Communicating with a room:
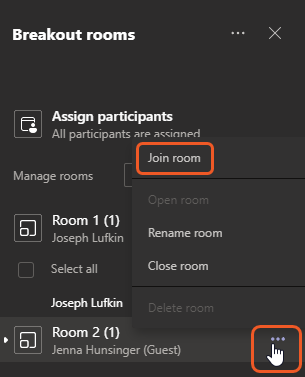
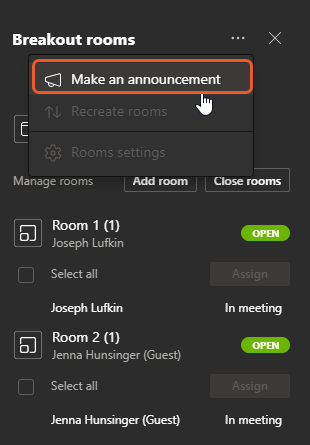
The meeting organizer can easily join any room or make announcements to the entire group by following the steps below.
Important things to know
- If a participant joins from a PSTN or Teams device, they can’t be assigned to rooms. Microsoft suggests using the main meeting as a breakout room for these attendees.
- Participants are moved to their assigned rooms as soon as the room is open, by default, but this setting can be changed.
- You can open and close rooms multiple times during a meeting.
Get more tips on making the most out of breakout rooms in Microsoft Teams here.

